

Whistler Peak 2 Peak Gondola for First-Time Visitors

I wasn’t going to write this article. The Peak 2 Peak Gondola in Whistler, BC, has attracted visitors from around the world for years. Resorts, tourism agencies, and bloggers have tons of information about it online. Being a first-time visitor to Whistler, I thought there would be nothing for me to add. Then, I spent two hours the night before I went trying to figure out some basics, like why I couldn’t access the $300 worth of tickets I’d just purchased, and I changed my mind. If it’s your first time taking the Peak 2 Peak Gondola, welcome. And don’t worry, you can still use those tickets you can’t access. Here’s the guide I wish I had, the step-by-step, explain-it-to-me-like-I’m-five guide to the Peak 2 Peak Gondola and the Cloudraker Skybridge. Let’s get through the logistics. It’s worth it.

Marmots are your reward for learning the ticketing system
How it works
The Peak 2 Peak Gondola is part sightseeing tourist attraction and part engineering wonder. It connects high-elevation areas on two mountains near Whistler Village: Blackcomb Mountain and Whistler Mountain. You ride a gondola up one mountain, take the Peak 2 Peak Gondola to the other mountain, then take a third gondola back down to Whistler Village. The route is in the shape of an inverted triangle. It operates most of the year.
If you visit in summer, you can also ascend to the Cloudraker Skybridge, a dazzling suspension bridge ending at the Raven’s Eye viewing platform on Whistler Mountain’s summit. The chairlift to the bridge is near the Peak 2 Peak Gondola terminal. One ticket covers everything: the gondolas, the chairlift, and the Cloudraker Skybridge. It’s called the Summer Alpine Experience.
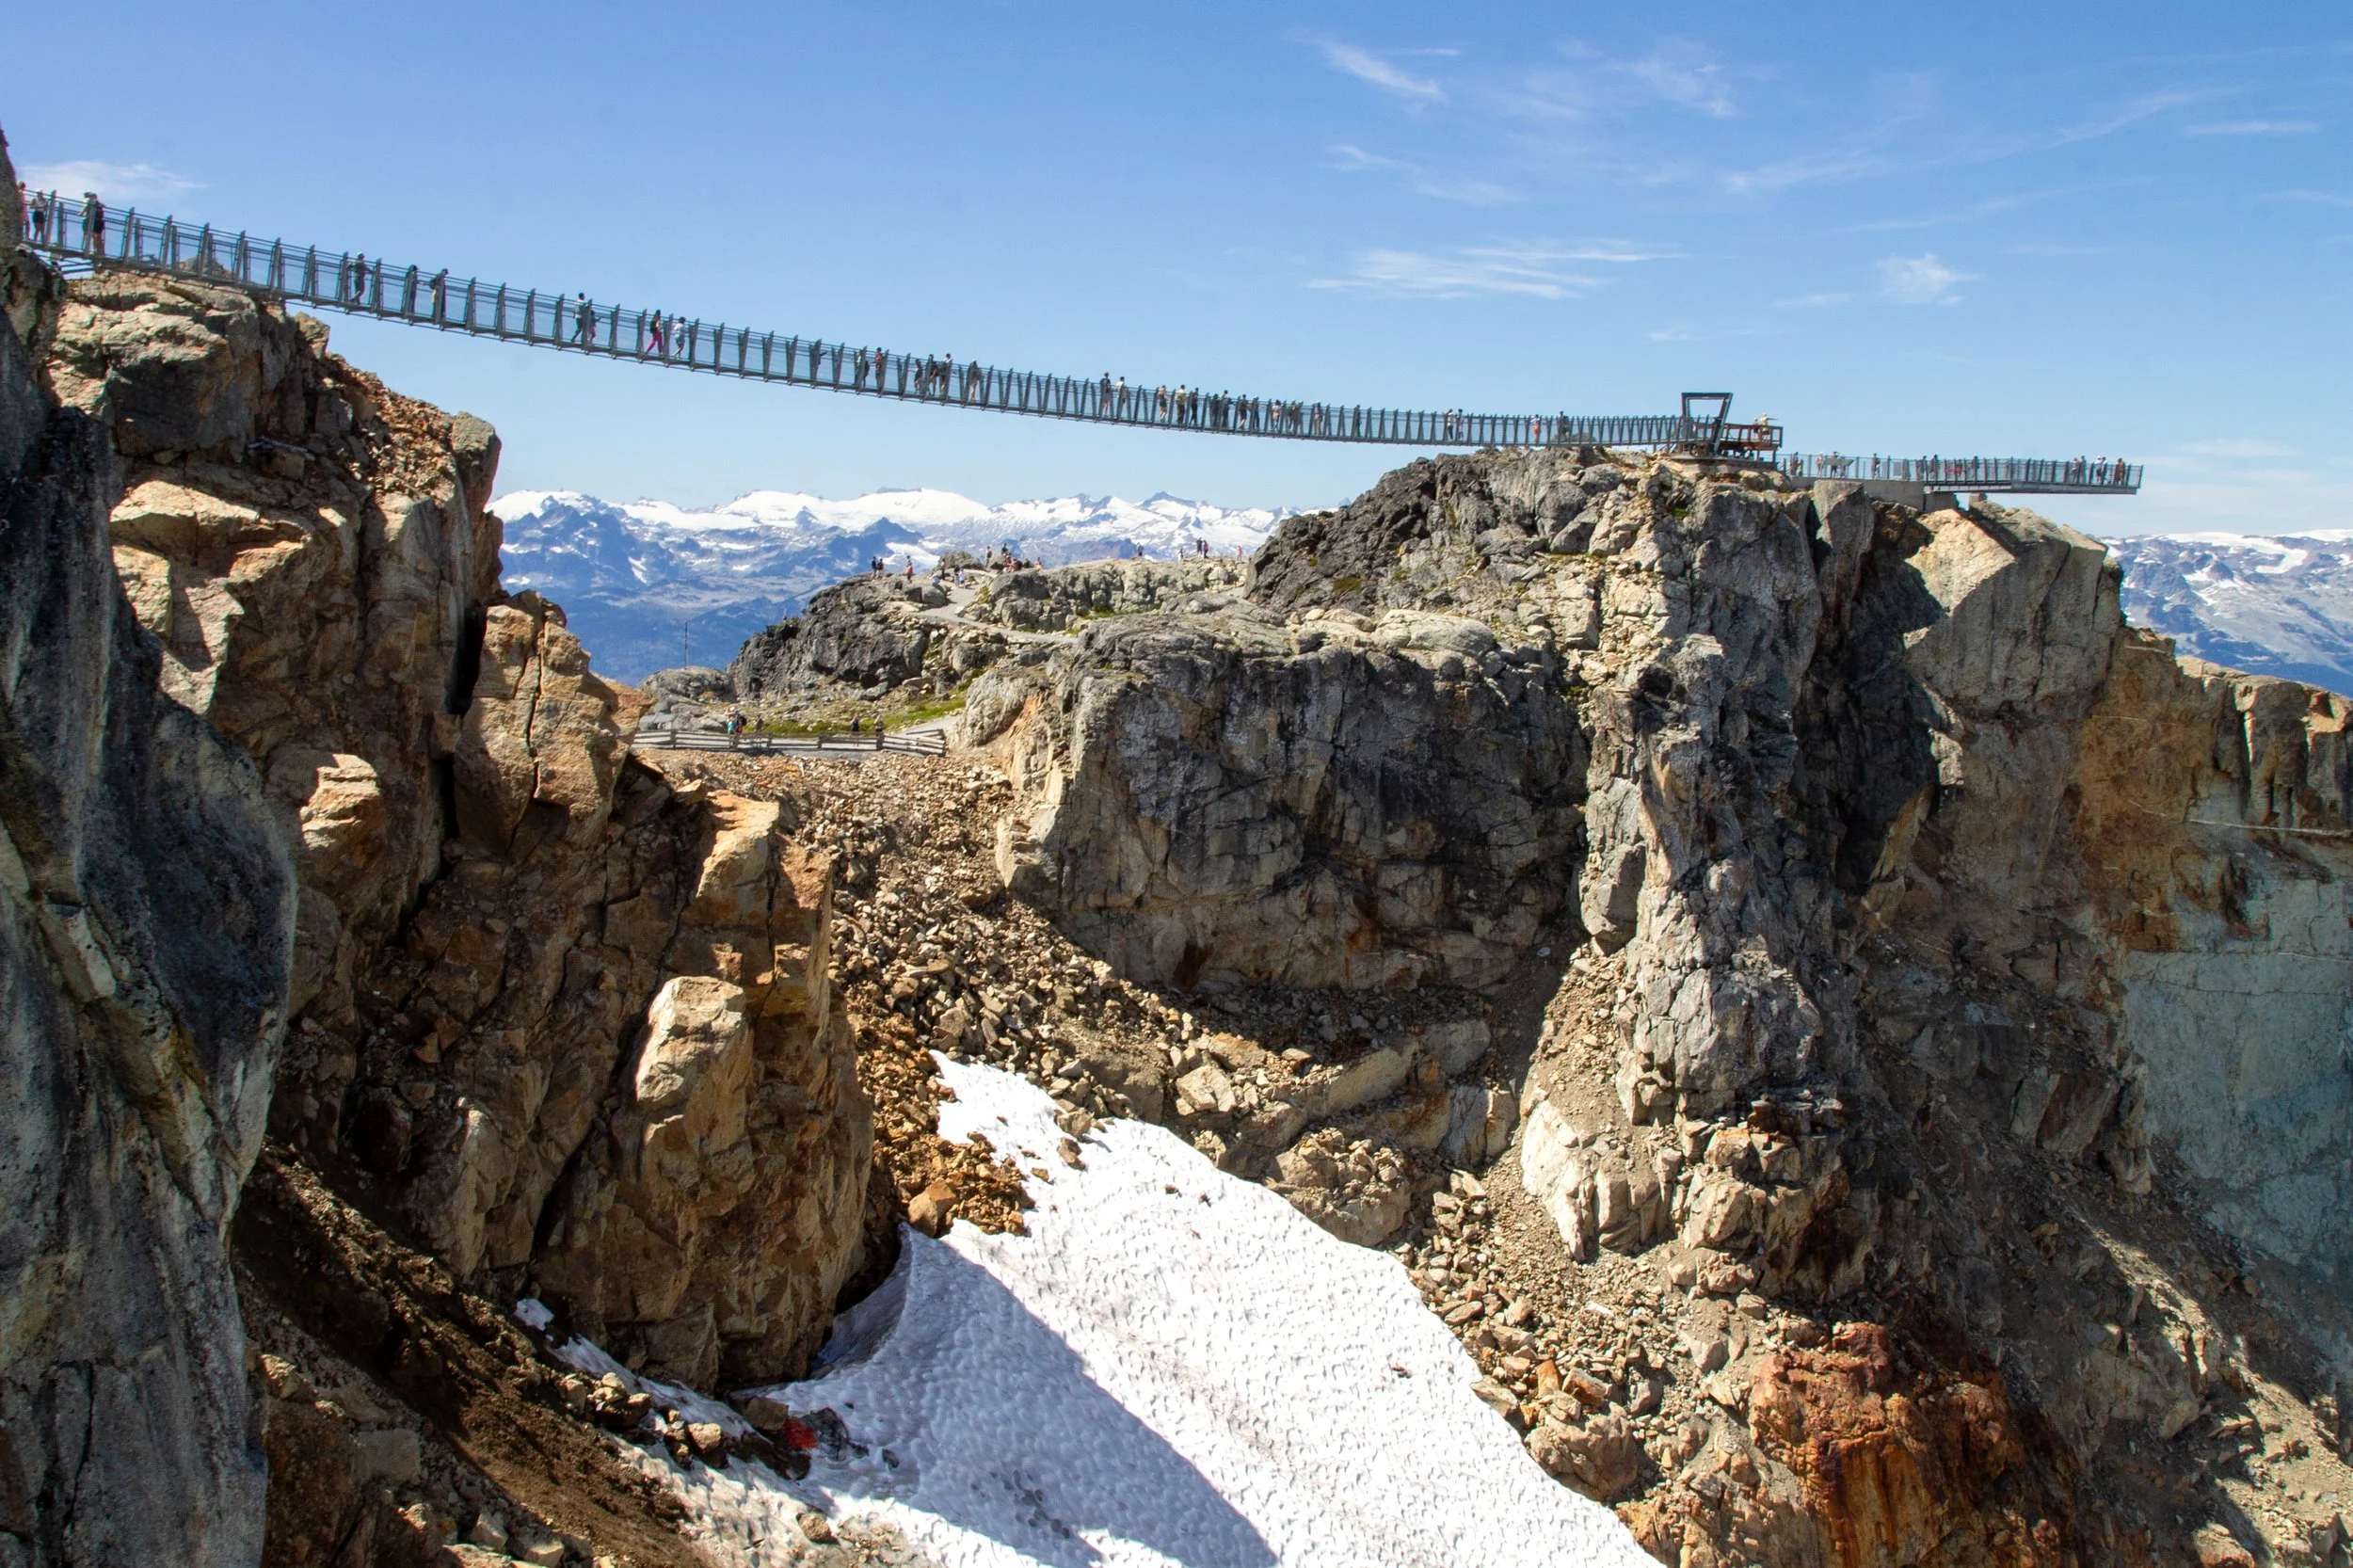
Cloudraker Skybridge
Suggested route
Starting in Whistler Village, take the Blackcomb Gondola up Blackcomb Mountain. Check out the restaurant, viewpoint, and any hiking trails that strike your fancy.
Take the Peak 2 Peak Gondola to Whistler Mountain.
(Summer only) On Whistler Mountain, take the chairlift up to the Cloudraker Skybridge. Check out the views and any hiking trails you’d like to tackle.
Take the chairlift back down. Head to the Roundhouse Lodge and enjoy the views. The Umbrella Bar is on the patio out back.
Take the Whistler Gondola back down to Whistler Village.
You can ride the Peak 2 Peak Gondola as many times as you want. Once you’re back in Whistler Village, you can’t go back up on the same ticket.
You can also do this route in reverse. Totally personal preference.
Itinerary
I’d plan on spending the whole day sightseeing on Blackcomb and Whistler Mountains, especially if you’re doing any hiking. My friends and I got to the Blackcomb Gondola terminal a little after it opened at 9:30 AM. We did one short-ish hike on Blackcomb Mountain, took the Peak 2 Peak Gondola, went up to the Cloudraker Skybridge, and spent some time at the Umbrella Bar on Whistler Mountain. We got back to Whistler Village a little before dinner time.
Gondola hours vary based on the time of year, day of the week, and which gondola you’re taking. I’d suggest starting around opening (9:30 - 10 AM) so you don’t run out of time. Routes start closing in the late afternoon. The Peak Express chairlift closes earlier than the gondolas. At a minimum, allow two hours for sightseeing. Check the schedule for specific hours before you head out.

Rendezvous Lodge on Blackcomb Mountain
Seasons
The Peak 2 Peak Gondola runs during the summer and winter for sightseeing.
Summer sightseeing begins on weekends in May, then daily in June. It closes in late September.
Winter sightseeing begins in November and ends in May.
The Peak Express chairlift to the Cloudraker Skybridge is open from around mid-June to mid-September, weather permitting. See the schedule for dates and hours. It’s closed in the winter.
The Cloudraker Skybridge is open in the summer
Buying tickets for the Peak 2 Peak Gondola
First, the easy part, which ticket to buy.
If you’re only spending one day sightseeing on the gondolas, buy a day pass.
If you’re going more than once in a season, it’s cheaper to buy a season pass than day passes.
If you have passes for skiing or mountain biking, the Peak 2 Peak Gondola is included.
Real talk, these tickets are expensive. Cost varies by season, rider age, and whether you book in advance. Find the list of rates here. I’m a budget traveler and chose the Peak 2 Peak Gondola as the splurge of my trip. I thought it was worth it. The gondolas take you to places that would be difficult to impossible to reach otherwise, and these mountains don’t have one boring square inch of scenery on them.
Now, the trickier part: how to buy tickets. I bought them online the night before I planned to go. I got an email receipt, but no tickets. The receipt mysteriously mentioned picking up my tickets at “the resort.” No name, no address. So, I downloaded the app mentioned on the ticketing website, which said my tickets didn’t exist. Since I’d just spent a hefty sum on them, this news was dismaying. As I scrolled on my phone for advice, I saw information saying that it isn’t possible to buy tickets online less than 3 days, or sometimes 7 days, in advance. My credit card statement disagreed.
If you’re in a similar situation, don’t panic. You can still use the very expensive tickets you just bought. You just need to pick up a physical card that looks like a credit card before you get on the gondola. I got mine in the little kiosk next to the Blackcomb Gondola terminal in Whistler Village. Details are below in the Picking Up Tickets section.
Now, admittedly, part of the problem is that I’m a last-minute planner. Since I was a first-time visitor to Whistler and was staying outside of town, I had no familiarity with the area. If you’re more organized, here are the options to get tickets:
You can buy them online through a couple of websites. One of them, whistler.com, only lets you buy them more than three days in advance. The other, whistlerblackcomb.com lets up buy them up to the same day.
At least three days in advance, you can call 1-800-766-0449 on the phone like it’s the 90s. Haha, I know, just horrifying.
Within three days, you’re supposed to buy them in person at the Whistler Visitor Center, 4230 Gate Way Dr, Whistler, BC V8E 0Z8, Canada. It opens at 9 AM. It’s a short walk from the parking lots on Blackcomb Way and the Blackcomb Gondola terminal. Tickets don’t sell out, so don’t worry if you didn’t buy them in advance.
Parking
If you’re staying in Whistler Village, you can walk to the Blackcomb and Whistler Gondolas from pretty much anywhere in town.
Since I was staying a few miles away, I drove to town and parked. The closest parking lots to the gondola terminals are on Blackcomb Way. The lots are numbered 1-5. Numbers 1 and 2 are the closest to the Blackcomb Gondola terminal, but we’re only talking about a five-minute difference. You can pay for parking with a credit card. It’s about $20 CAD for the day.
After parking, follow the paved walking and biking trail along Blackcomb Way. Signs will point you toward the gondola terminal. The Valley Trail next to parking lot #1 cuts through a park and crosses a covered bridge. It ends at the Blackcomb Gondola terminal. The walk takes 5-10 minutes, depending on where you park.

Take this trail from the parking lots to the gondola terminal
Picking up tickets
When I arrived at the Blackcomb Gondola, I still didn’t know how to access my tickets. I went to the kiosk next to the gondola terminal to see if the staff could direct me to the right place. The woman behind the counter asked to see my email receipt, then handed me three plastic ticket cards. Easy peasy.

The kiosk
In case the kiosk doesn’t work out when you go, head to the Blackcomb Day Lodge, which is the building right across from the gondola terminal.
After getting the cards, my friends and I were able to walk right onto the gondola. I had read online that riders sometimes have longer waits. On the Saturday we went, lines were never more than a few minutes.

Blackcomb Gondola Terminal
Gondola quick tips
Dogs aren’t allowed on the gondolas except for certified aid dogs.
Gondolas are wheelchair accessible, as are the lodges on Blackcomb and Whistler Mountains. The Peak Express chairlift to the Cloudraker Skybridge is not.
Kids can ride the gondolas, including the Peak 2 Peak Gondola. They need to be at least 40” tall to ride the Peak Express chairlift to the Cloudraker Skybridge.
You can bring a bike or skis onto the gondolas.
The ride is smooth and comfortable. Even if you’re not a big fan of heights, I think you’ll be okay.
Both Blackcomb and Whistler Mountain have restaurants, drinking water, and restrooms in the lodges near the gondola terminals. You can bring your own food or buy it there.

Peak to Peak Gondola
Transit times
Blackcomb Gondola: 18 minutes
Peak 2 Peak Gondola: 11 minutes
Peak Express chairlift: 15 minutes
Whistler Gondola: 25 minutes
The times are approximate. The first three trips went quickly when I rode. The Whistler Gondola stopped several times on the way down, making the trip longer.
What to wear on the Peak 2 Peak Gondola
Since you’ll be at high elevations, temperatures will be lower than in Whistler Village. I rode the Peak 2 Peak Gondola on a hot day. It was close to 32 °C (90°F) in town. In the mountains, it was warm but comfortable, around 25 °C (77°F). Even if it’s warm, it’s a good idea to cover up. The sun is strong, and sunscreen alone wasn’t enough to avoid a little sunburn. Also, a funny side note, the stores in town were sold out of aloe when I looked. In summer, I’d wear light, breathable clothes and bring a layer in case it’s cold. Bring a water bottle and sturdy shoes if you’re hiking, preferably hiking boots. In winter: coat, hat, gloves, waterproof boots, the works.
Blackcomb Mountain

Rendezvous Lodge patio
Rendezvous Lodge and viewpoint
While laying out the mundane logistics, I’m afraid I haven’t captured how mind-blowing the Whistler gondola system is. It takes minutes to ascend what would be a grueling all-day uphill slog on foot. At the top of the Blackcomb Gondola, you’ll be 1860 meters (6102 feet) above sea level with the peaks of British Columbia’s Coast Range surrounding you in all directions. Beneath them, even the largest resorts in Whistler Village look like puny specks. The lakes in and around town are turquoise pools amid dark green conifer forests.

Viewpoint on Blackcomb Mountain
The Rendezvous Lodge has an indoor space with large windows and a patio with picnic tables. You can bring lunch with you or grab something from the restaurant. The menu has a variety of crowd pleasers like burgers, curry bowls, burritos, and mac & cheese. Next to the restaurant is a viewpoint overlooking the mountains to the west and north. Fireweed added patches of purple to the slopes in August.

Blackcomb Mountain
Hiking on Blackcomb Mountain
Beyond the viewpoint is a gravel path that brings you to Blackcomb’s many kilometers of hiking trails. Look for the large wooden arch to get started. If, like me, you live at sea level, pick a trail that’s easier than what you’d usually do. I didn’t feel like I got a full breath of air until I was back in Whistler Village. Still, the incredible views along the trails make a few panting breaks worth it. Watch for marmots and pikas scurrying around the chunky rocks. From late July until mid-August, wildflowers like lupines and paintbrush bloom along the trails.

Alpine Walk Loop
Several connected loops on Blackcomb Mountain make it easy to choose your distance. Here are great hiking options that start from the gondola terminal:
The Alpine Walk Loop is an easy and mostly flat 1.4-km (1-mile) hike with views of the mountains to the west and south.
At the far end of the Alpine Walk Loop, you can continue on the Overlord Trail to the Lakeside Loop. This 5.6-km (3.5-mile) moderately difficult hike ends at Blackcomb Lake beneath the mountain’s summit.
The Overlord Trail also connects to the Marmot Trail, which makes an uphill climb to a snowmaking reservoir. The end of the trail was closed when I went, but you can return to the lodge on an access road next to the reservoir. The loop hike is about 4 km (2.5 miles) total.
Beyond the Lakeside Loop, you can continue to the Decker Loop for a challenging 9.7-km (6-mile) hike to small alpine lakes and stunning viewpoints.

Marmot Trail
Peak 2 Peak Gondola
After exploring Blackcomb Mountain, head to the Peak 2 Peak Gondola terminal. It’s very close to the Blackcomb terminal. When you walk inside, you’ll see two lines. One is long and slow. The other is short to non-existent. The long line is the wait for the glass-bottomed gondola, which comes every fifteen minutes. I’d recommend the shorter line. It will save you potentially over an hour of waiting, and the glass window at the bottom looked pretty small when we passed it. Plus, you can just look down from the regular gondola ride and see similar views.
Whistler from the Peak 2 Peak Gondola
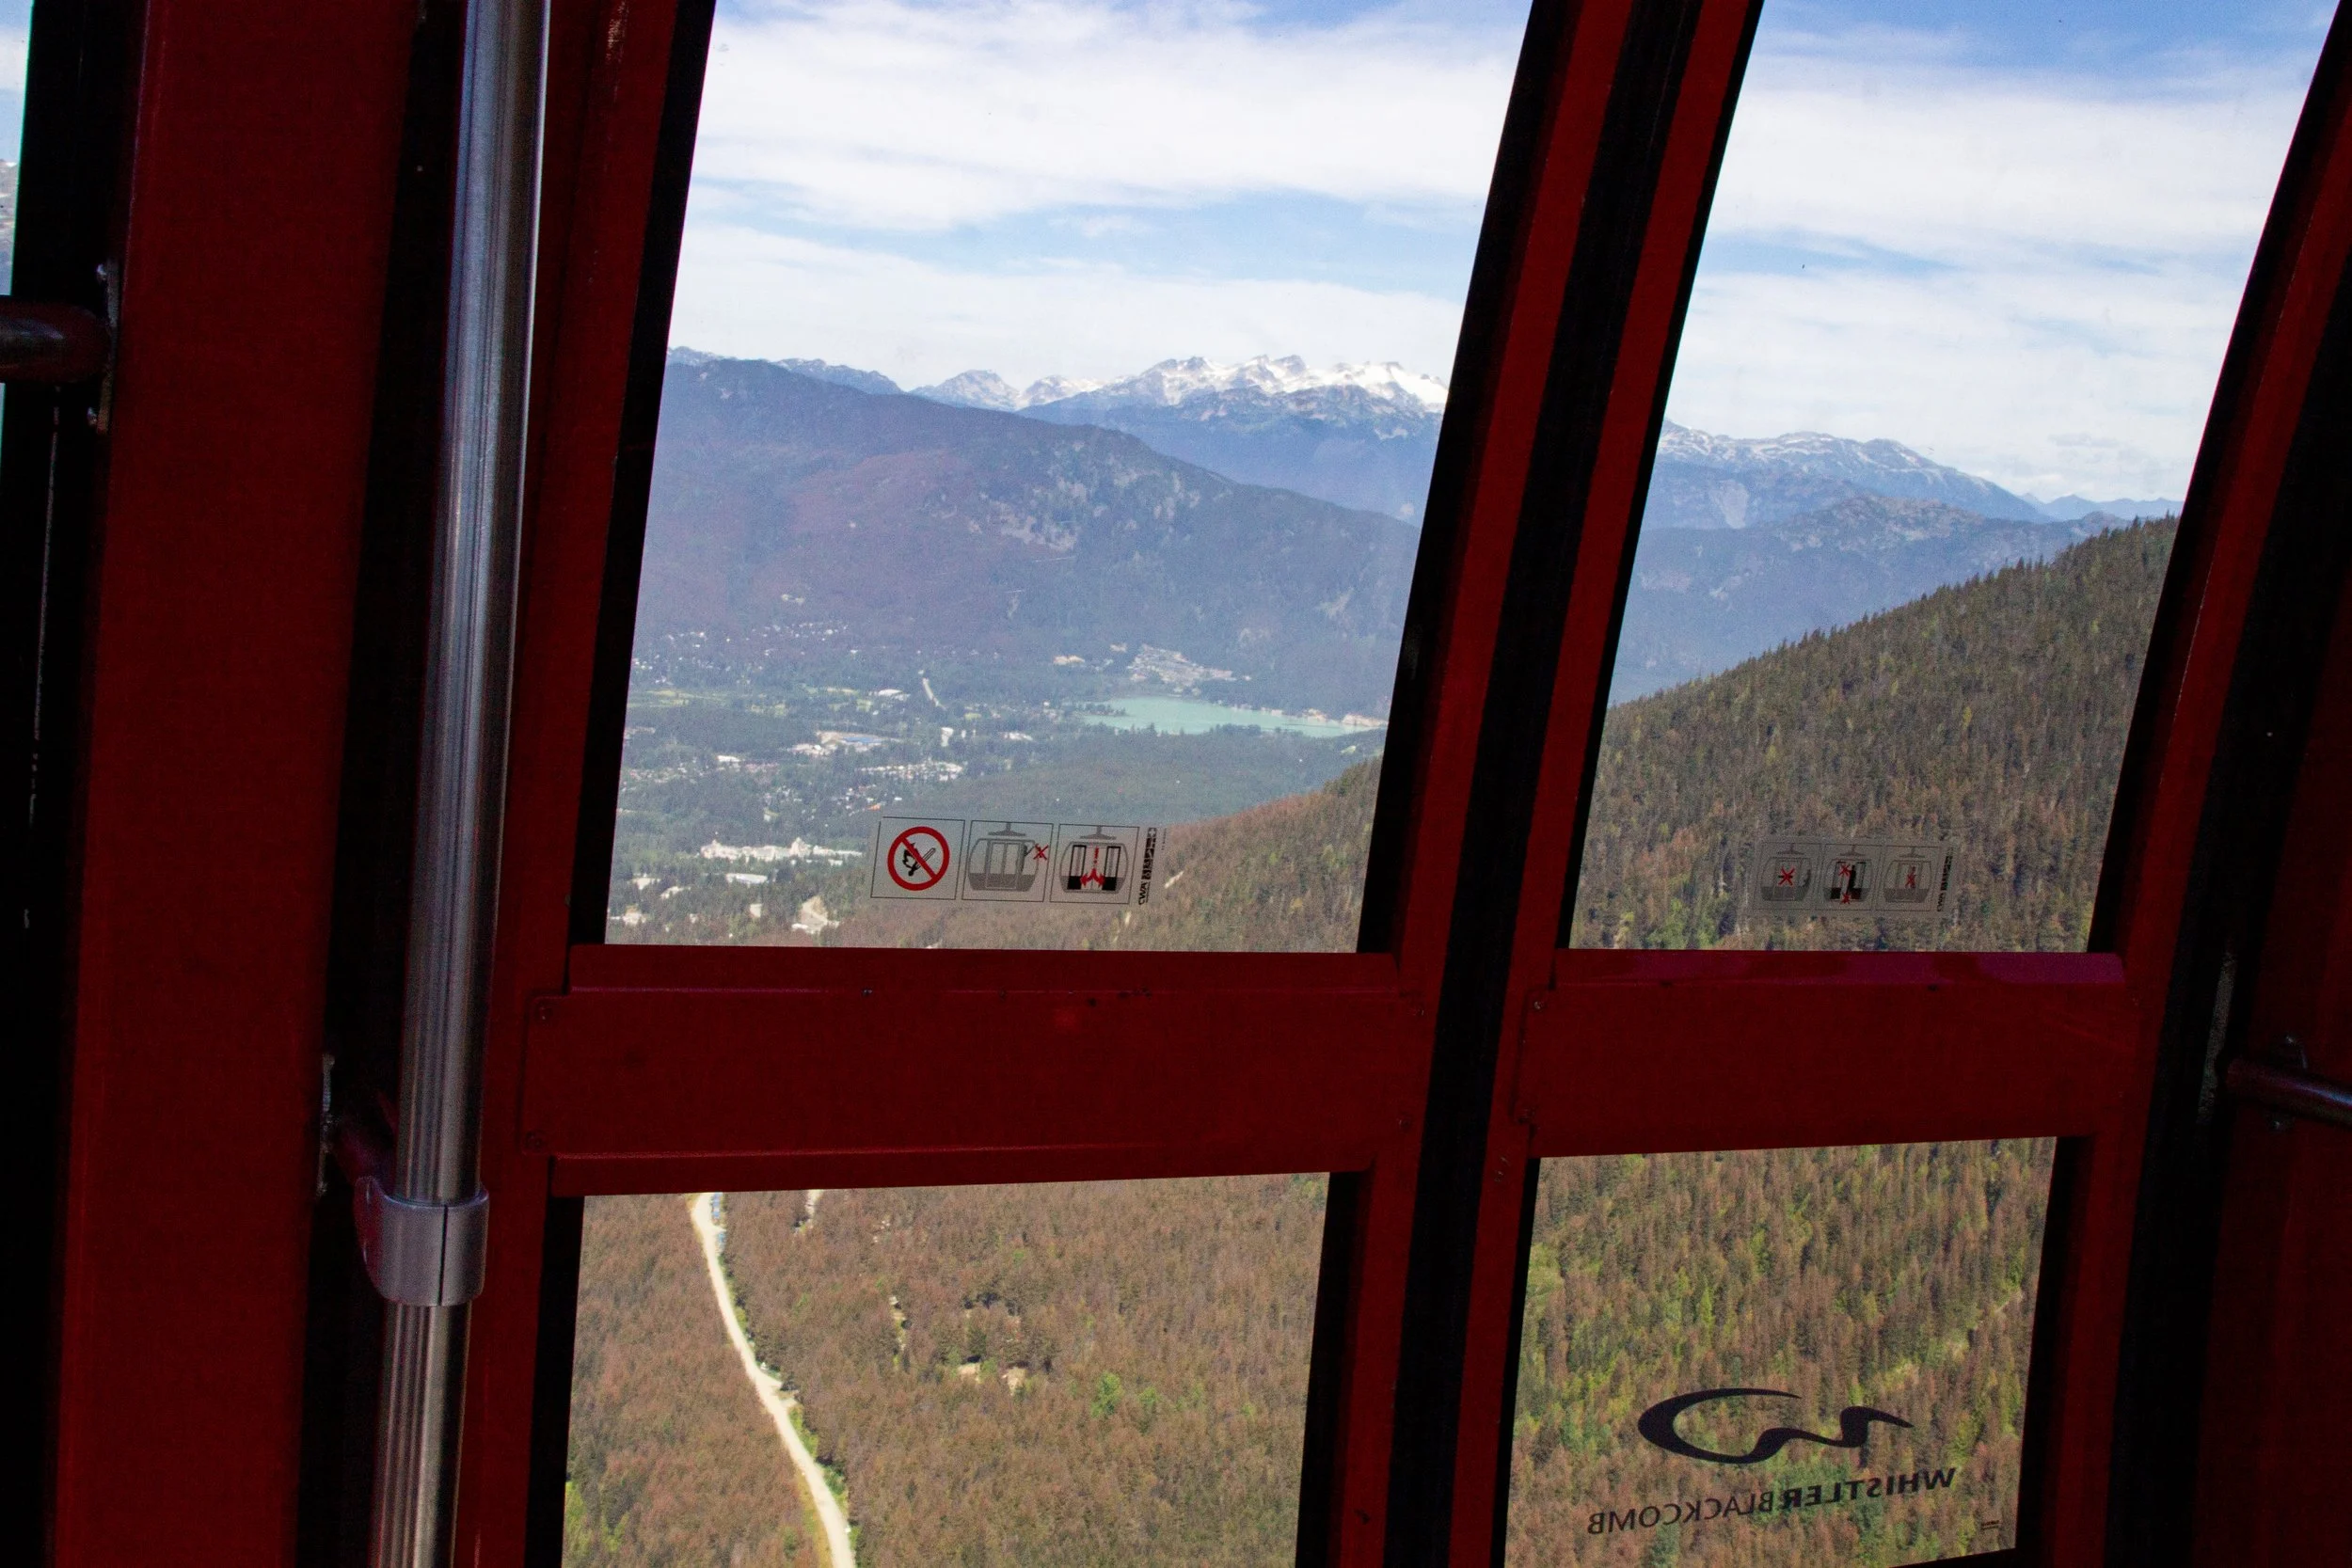
The Peak 2 Peak Gondola is the kind of engineering marvel that looks like it should be impossible. The cable spans 4.4 km (2.7 miles) between Blackcomb and Whistler Mountains. When it was built, it had the longest distance between gondola towers in the world, 3 km (1.9 miles). Today, one in Germany is slightly longer. During the 11-minute ride, you’ll be dangling in a bulb of glass and metal 436 meters (1430 feet) above green alpine slopes dotted with hemlock trees. If you can overlook the unlikeliness of it all, the ride is quiet, smooth, and comfortable.
Whistler Mountain

Peak 2 Peak Gondola terminal and Roundhouse Lodge on Whistler Mountain
On the other side of the Peak 2 Peak Gondola, you’ll be high on the slopes of Whistler Mountain. Olympic rings stand in front of the Roundhouse Lodge. Nearby are some games and activities, like axe-throwing. Inside the lodge is bustling with visitors browsing the gift shop and filling up bottles at the water station. Upstairs, you can grab food to eat at one of the tables inside or on the large patio out back. Either way, you’ll have excellent views of the mountains.

Roundhouse Lodge
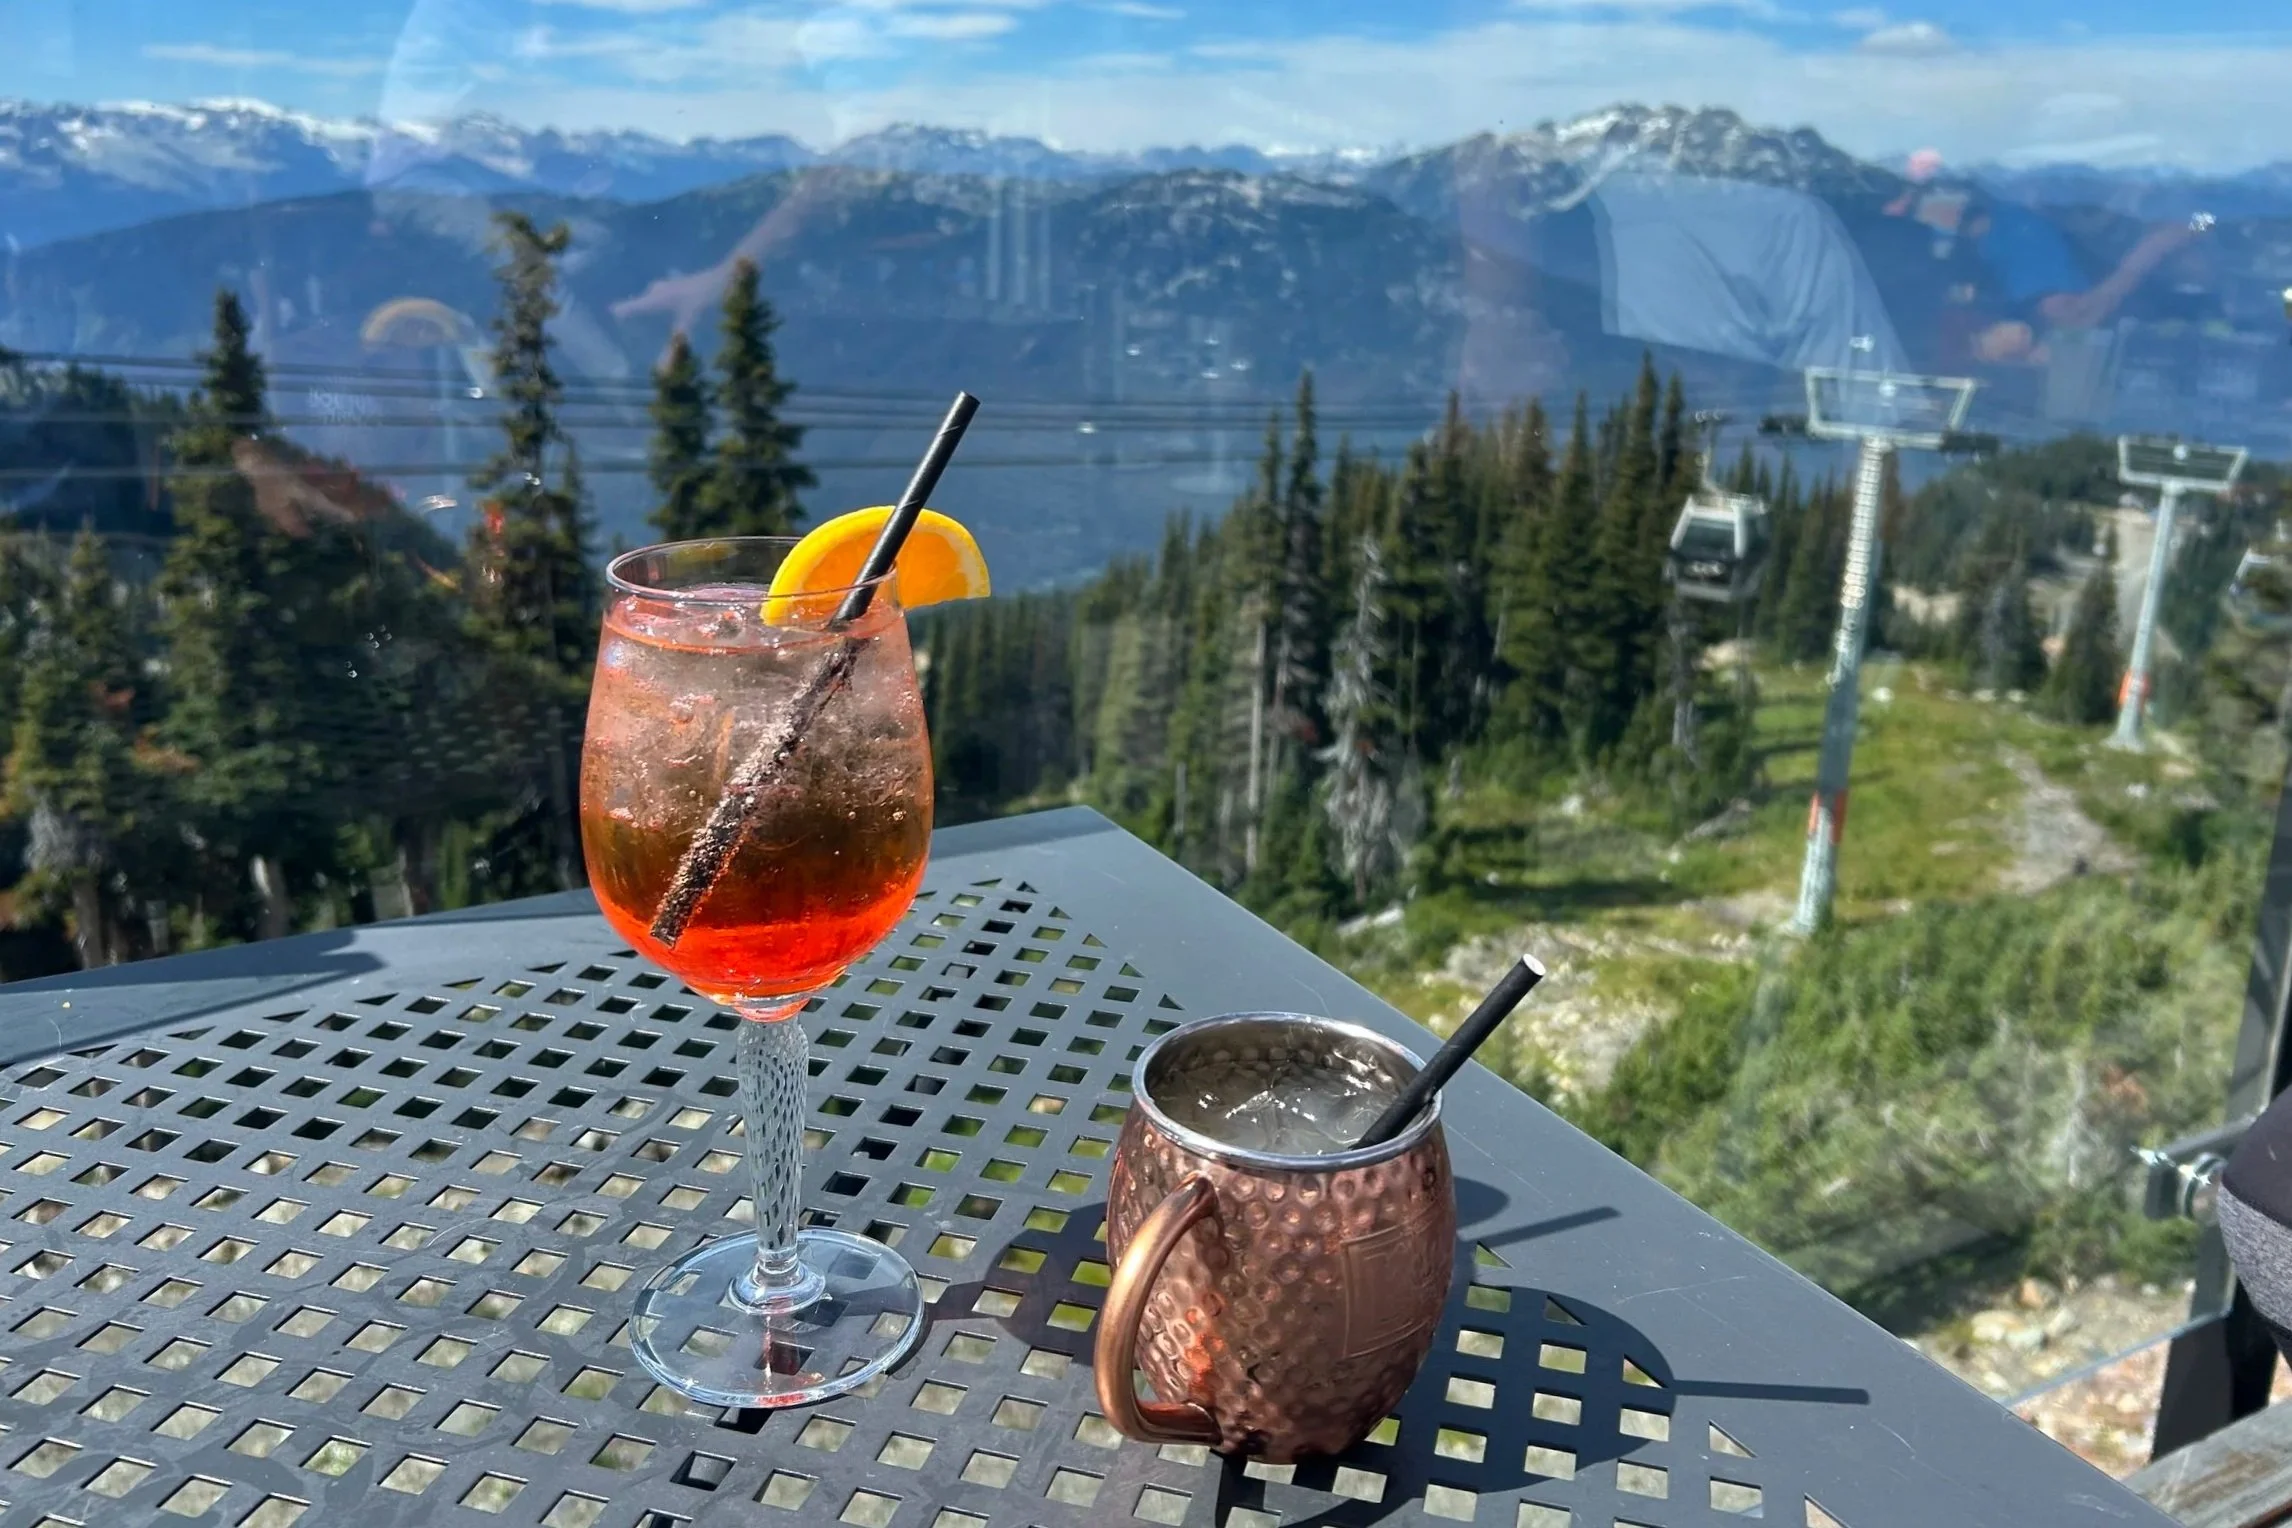
The Umbrella Bar on the patio is one of the most beautiful places imaginable to have a drink. Glass walls form a semicircle with mountain peaks in all directions. The bar serves beer, wine, and cocktails. The prettiest ones have muddled fruit and carbonation. I nursed my water while my friends had drinks since I was feeling woozy from the elevation. The views make it worth lingering in the thin air.
Umbrella Bar
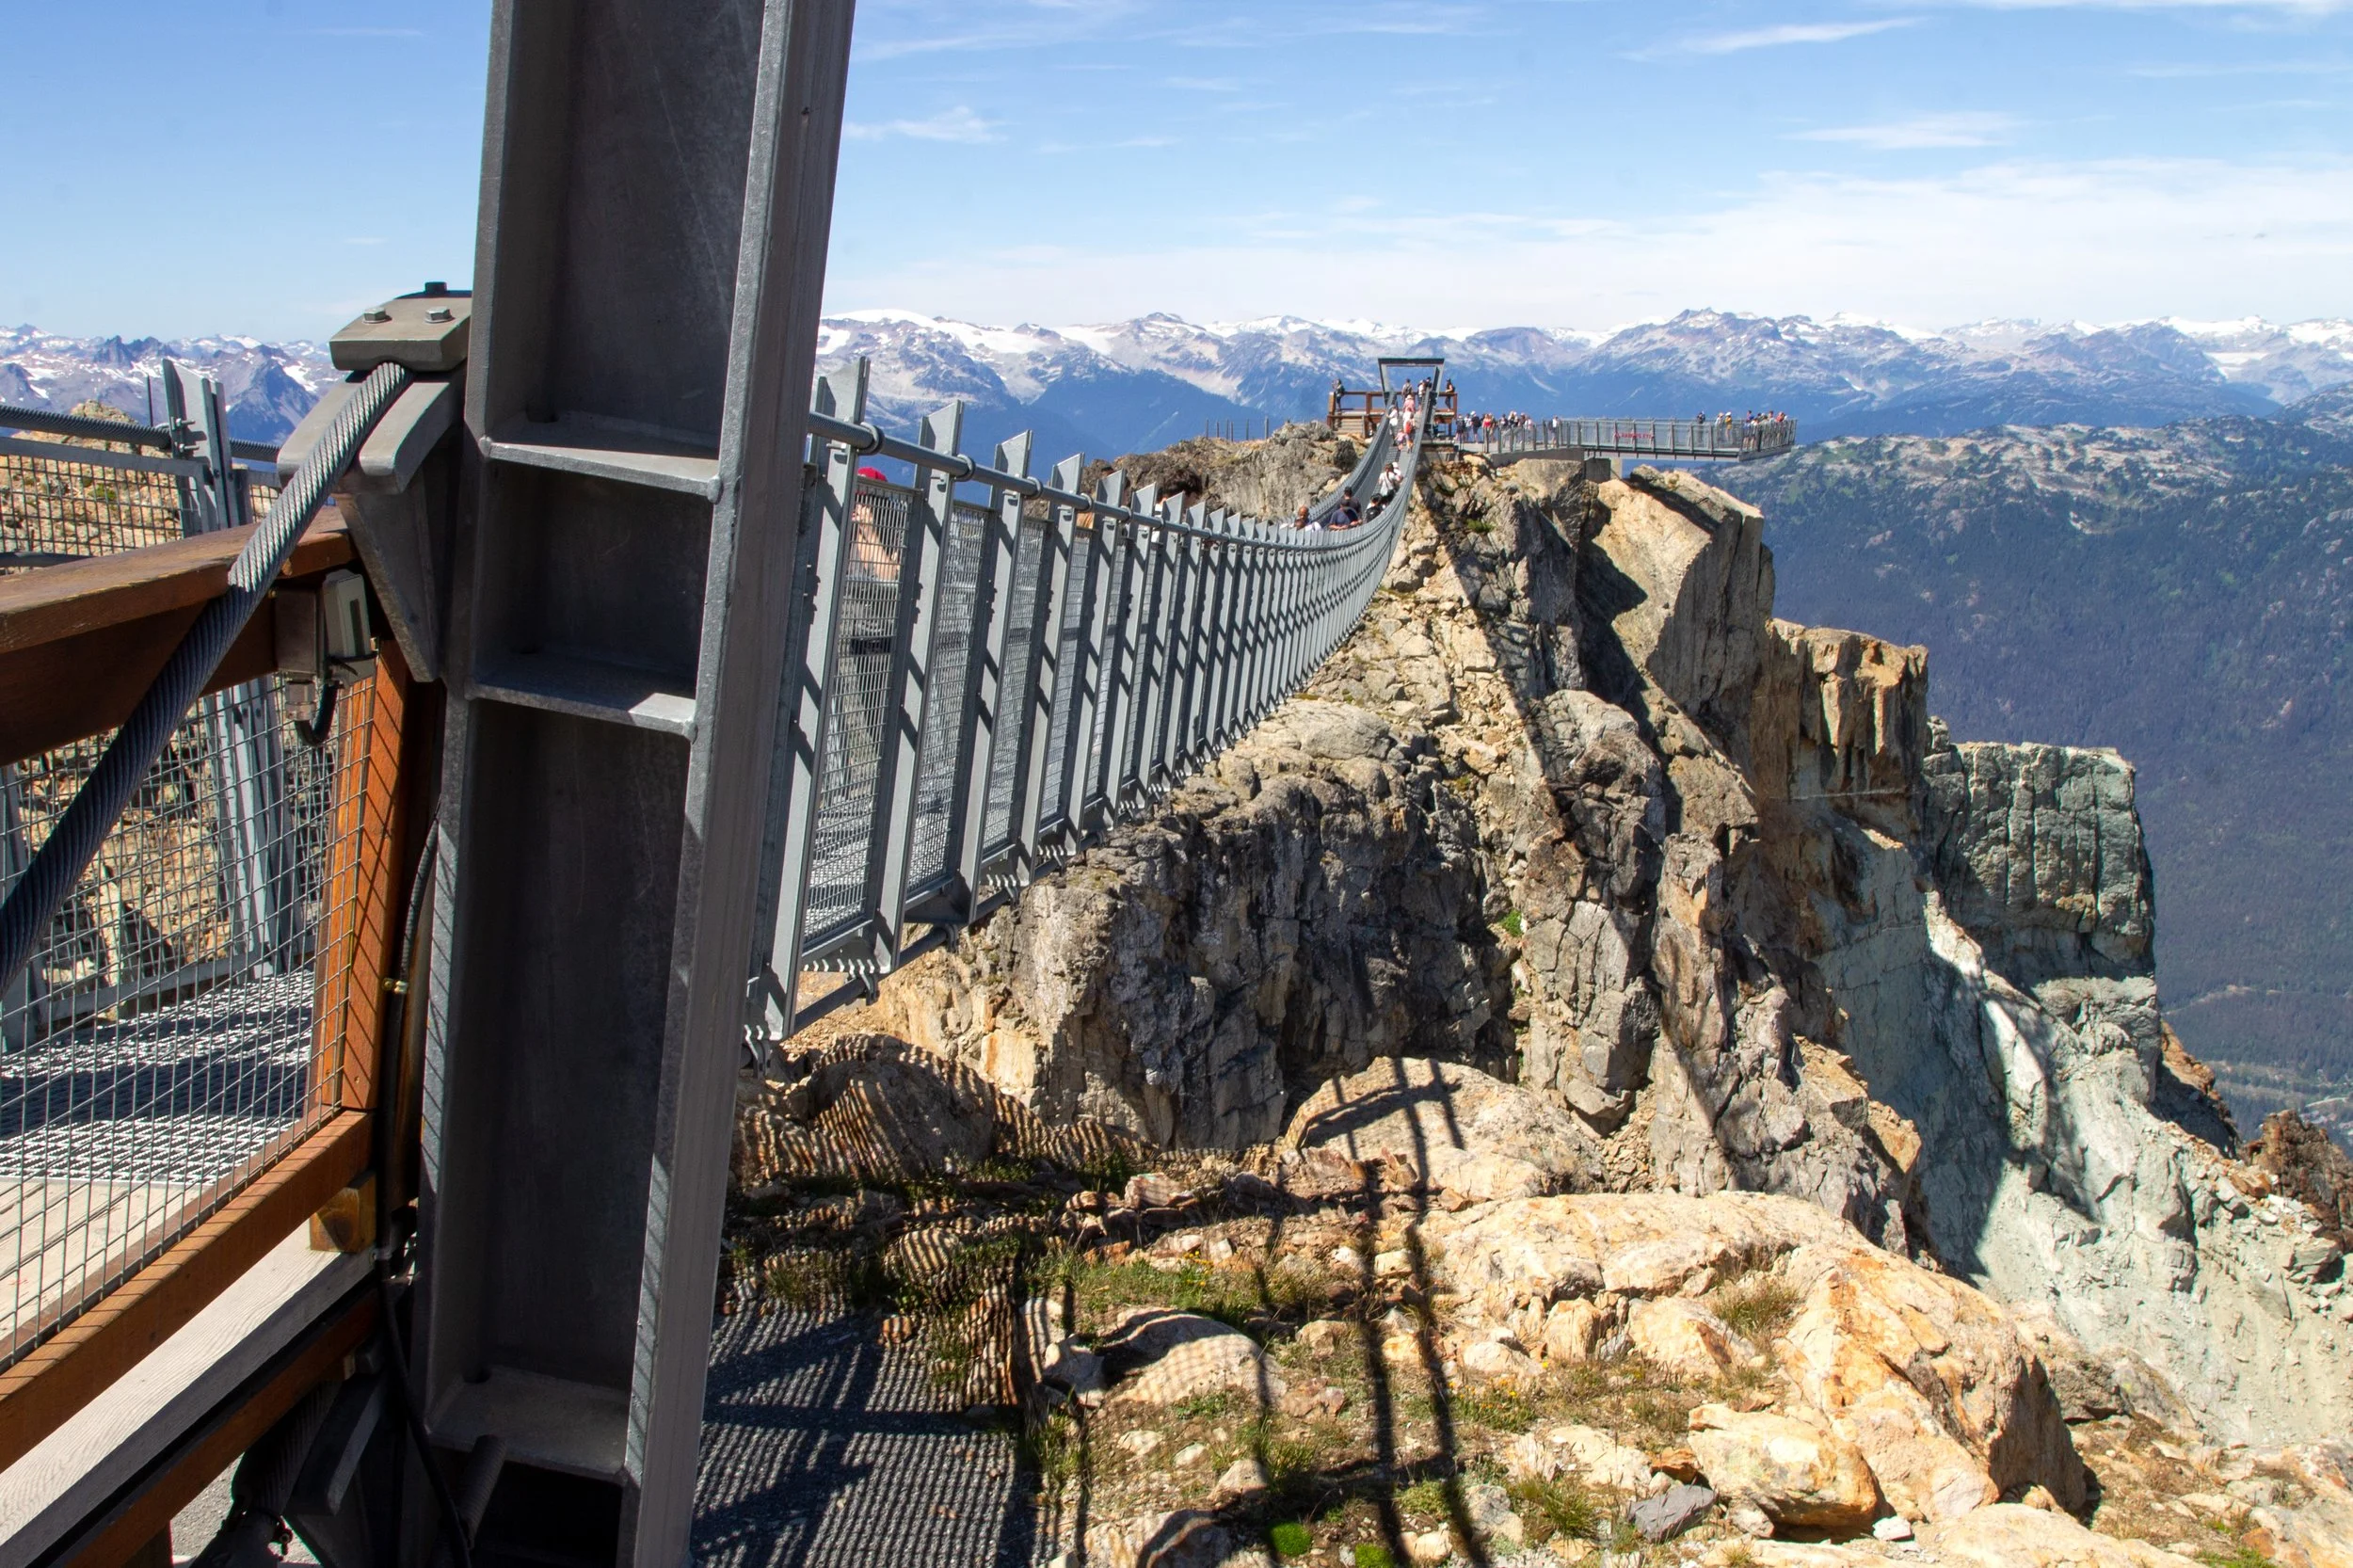
But I’m getting ahead of myself. Before stopping for refreshments, I’d highly suggest taking the Peak Express chairlift up to the Cloudraker Skybridge. It closes before the gondolas, so it’s a good idea not to leave it for last.
Cloudraker Skybridge

Peak Express chairlift. The Roundhouse Lodge is at the top of the slope.
Unlike the Peak 2 Peak Gondola terminal, the Peak Express chairlift isn’t right next to the lodge. Take the trail that begins at the wooden arch. A banner on it says Top of the World. A sign will also tell you if the chairlift is running. The weather sometimes impacts it. Head down the 0.6-km (0.4-mile) gravel path. It’s a 10-minute walk that’s easier on the way down. The return journey is very uphill. Children must be at least 40 inches tall to ride the chairlift.

Cloudraker Skybridge and Raven’s Eye
The Peak Express chairlift ends at Whistler Mountain’s summit, where panoramic alpine vistas surround you from 2182 meters (7160 feet) of elevation. The Cloudraker Skybridge is next to the top of the chairlift.

Cloudraker Skybridge
Across the 130-meter bridge is the Raven’s Eye viewing platform. From the triangle-shaped walkway, you’ll have views of Whistler Village, Alta Lake, Green Lake, and mountains all around. I have no problem with heights, so the bridge was just my cup of tea. If I did, I think it would still be okay. It’s stable, feels solid, and has railings on either side. If you’d rather skip it, you can still get similar views from the trails.

Raven’s Eye viewing platform
After tackling the Cloudraker Skybridge, it’s worth checking out the Whistler Summit Interpretive Walk. This small network of gravel trails brings you to a staggering variety of mountain views over a short distance. Look for, among others, Blackcomb Mountain, Wedge Mountain, Mount Currie, Rainbow Mountain, Black Tusk, and the Tantalus Range.
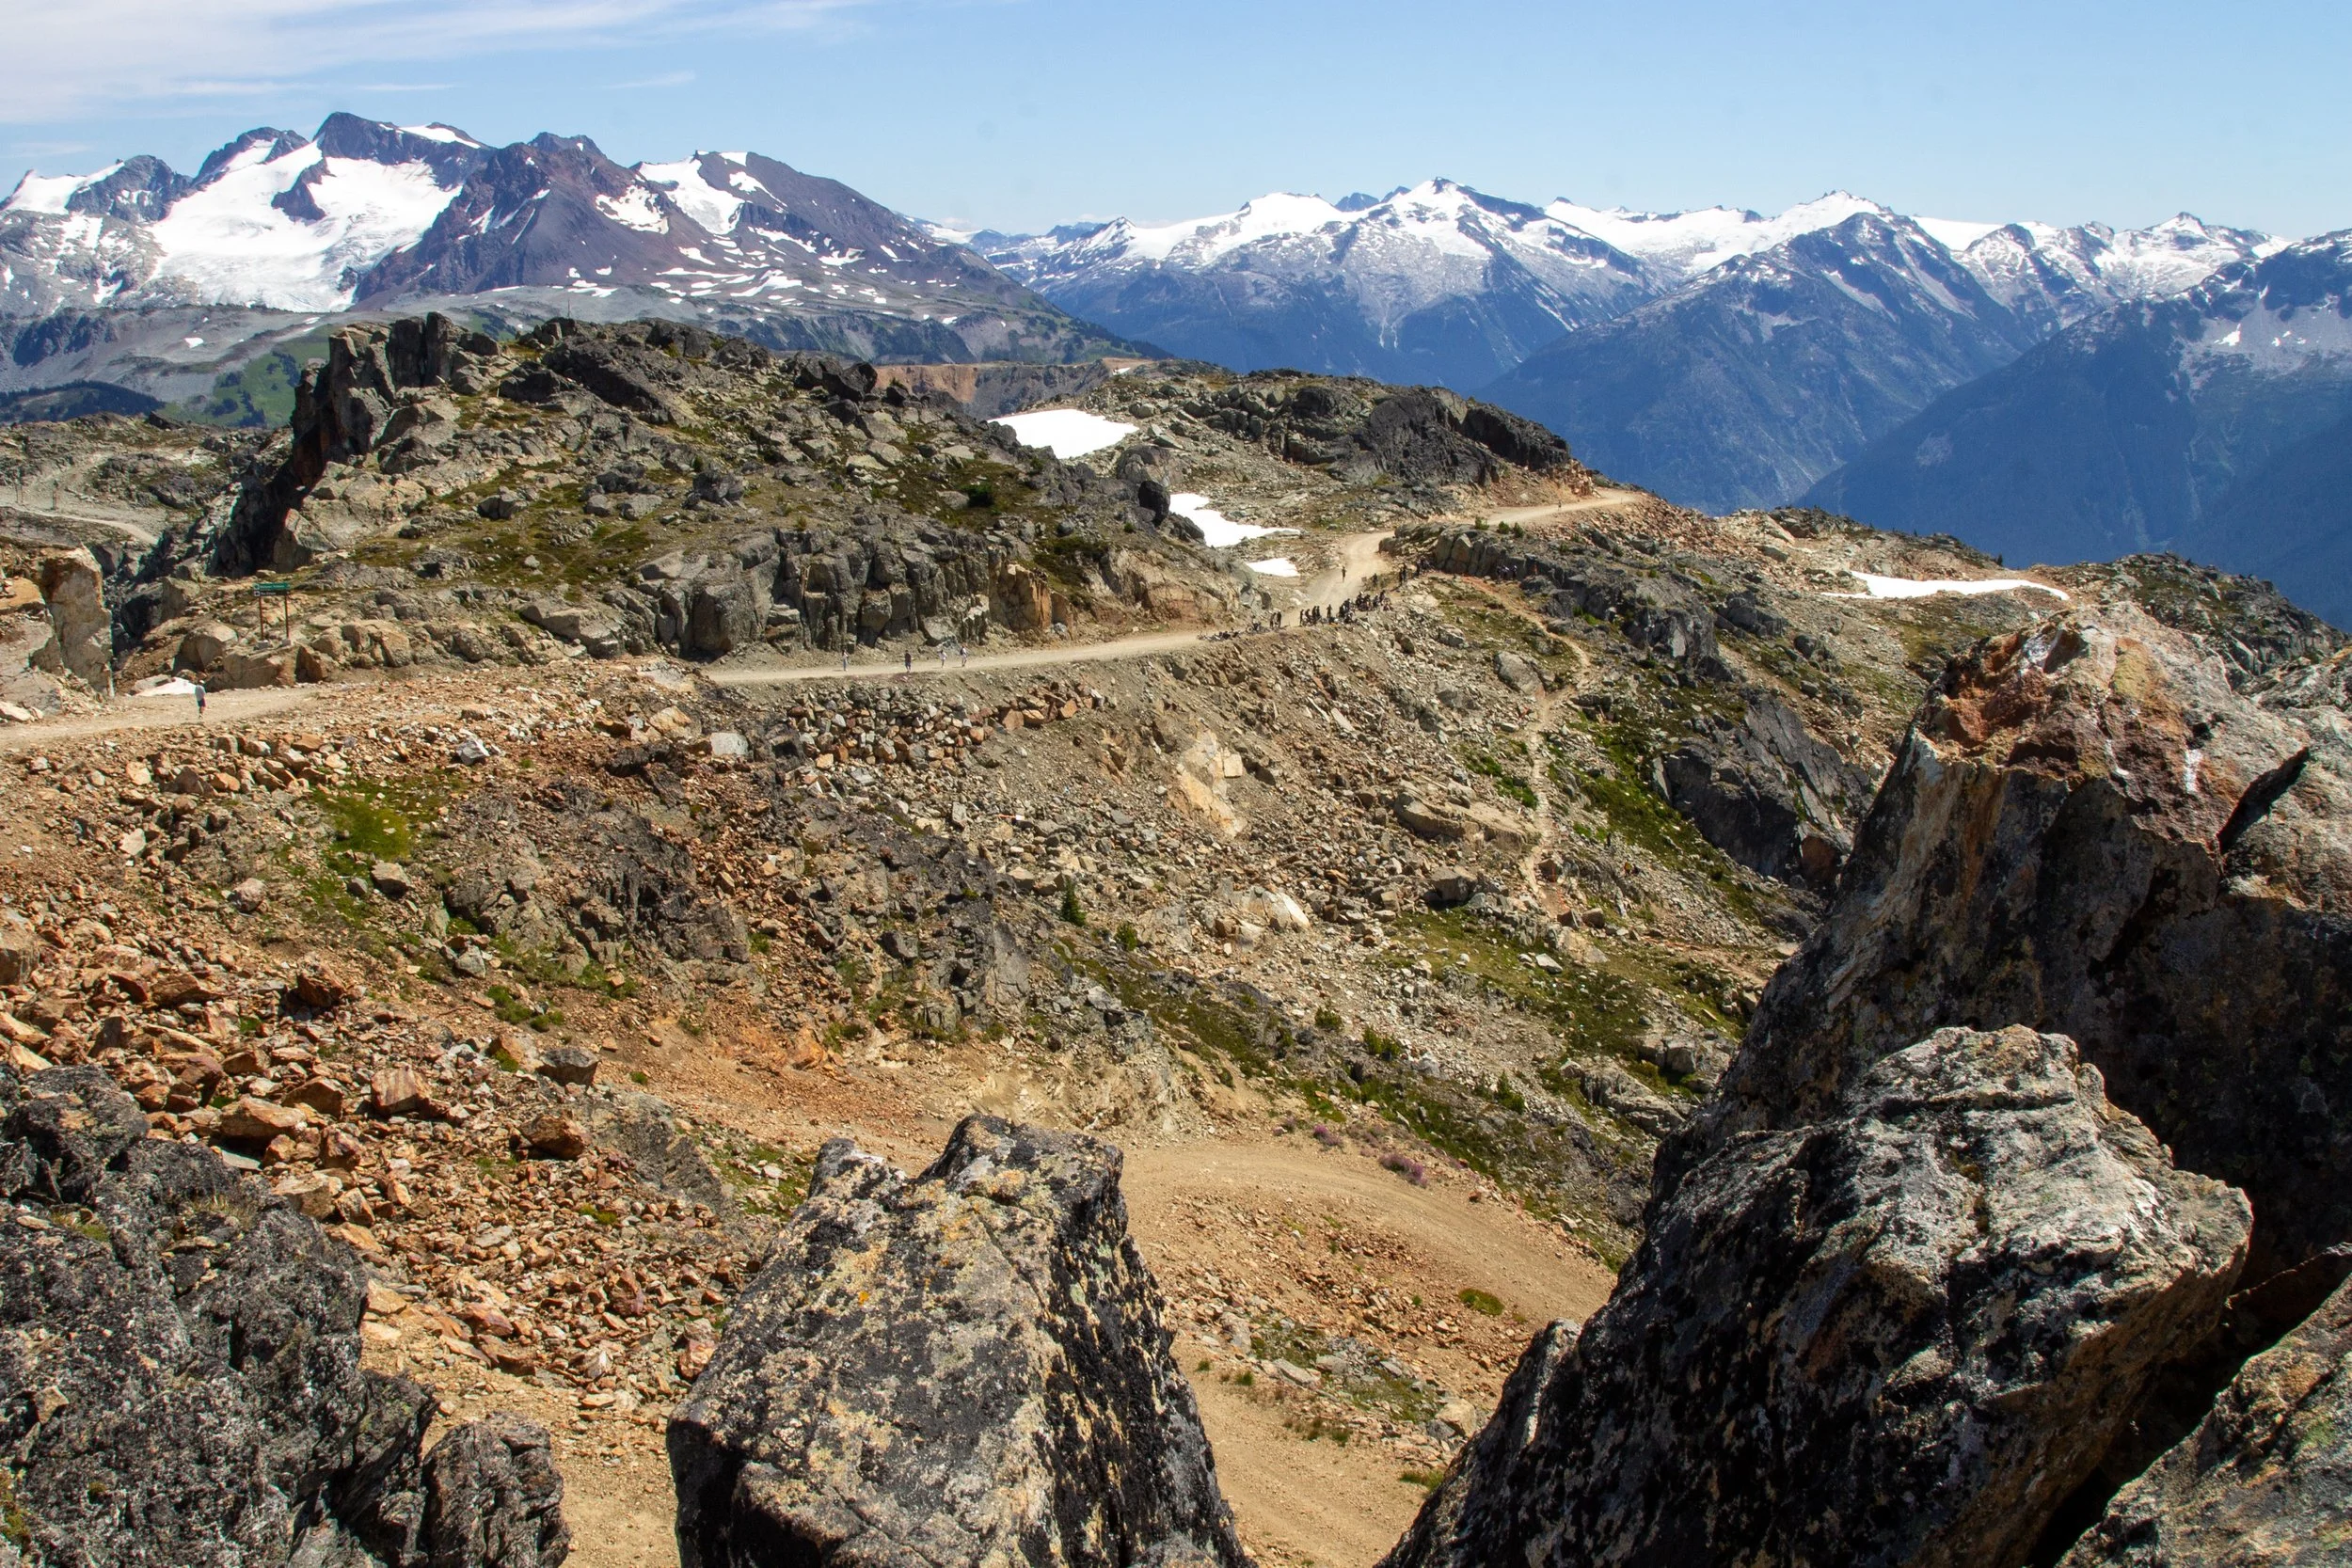
Views from the Whistler Summit Interpretive Walk
Another highlight of Whistler Mountain’s summit is the inuksuk, the stone statue in the shape of a man. It’s one of several added in and around Whistler in honor of the 2010 Olympic Games. They reflect the traditions of the Inuit in northern Canada, who use them to mark routes and places of importance.

Inuksuk on the summit of Whistler Mountain
Along the Whistler Summit Interpretive Walk is the start of the High Note Trail, the most famous hike on the Peak 2 Peak Gondola network. The trailhead sign is near the Raven’s Eye viewing platform. This 10-km hike descends from Whistler Mountain’s summit back to the Roundhouse Lodge, with breathtaking scenery from start to finish, like the stunning overhead view of Cheakamus Lake. At least by reputation. My body was feeling very unhappy about the elevation at this point, so I returned on the chairlift.
Whistler Gondola
To return to Whistler Village, take the gondola from the terminal near the Roundhouse Lodge. This ride takes the longest, around 25 minutes without stops. When I rode, it was longer due to multiple prolonged stops. Prepare to be in there for a while is what I’m saying. At the bottom, you’ll be back in Whistler Village within easy walking distance from the Blackcomb Gondola terminal, the parking lots, and tons of dinner options.

Whistler Gondola terminal back in town
Whistler Creekside Gondola
Final note that won’t be relevant to most people. A few miles away from Whistler Village, a separate gondola starting from Whistler Creekside brings riders to around the same place as the Whistler Gondola. Since I was staying in Whistler Creekside, I tried to learn if I could use that gondola to connect to the Peak 2 Peak Gondola. As best as I can tell (and, wow, I looked!), the Whistler Creekside Gondola is only for bikers using the bike park. Foot traffic users can only start from the gondola terminals in Whistler Village.
Enjoy your sightseeing day on the Peak 2 Peak Gondola!
With love,
Emma
Explore nearby

Find the best stops between Vancouver and Whistler on the Sea to Sky Highway.

Spend an incredible three days in Vancouver.